

One of the scariest moments is when you are riding off-road trails and notice that each time you turn you are hearing a clicking noise. Your mind will imagine the worst-case scenario before you ever get a chance to investigate.
The worst possible thing you can do is let your mind run away with you. That clicking noise may be nothing more serious than a torn mudflap or a stick that is lodged beneath your vehicle.
There really are several things that can cause a sound like this.
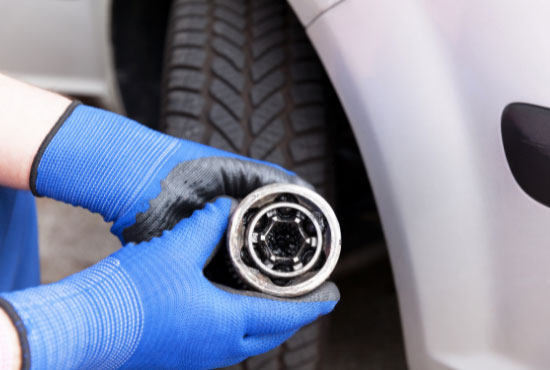
Loose Lug Nuts
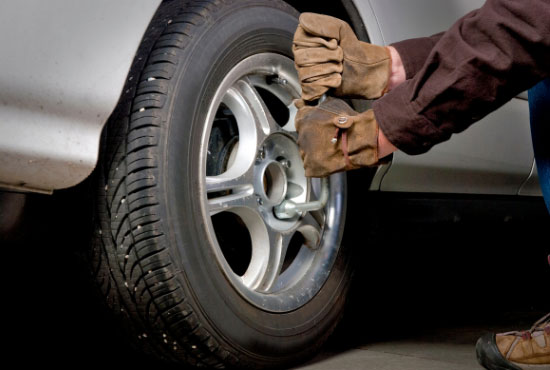
If the lug nuts on your wheel have worked loose they can allow the wheel to move just enough to create unique clicking noises. The noises are most likely to occur when you are turning because you are placing strain and pressure on the wheel at that time.
Constant Velocity Joints
A constant velocity joint is commonly referred to as a CV joint. If you hear a clicking noise only when the 4-wheel drive of the vehicle is engaged and under a stress or when you are speeding up as you go around a corner then there is a good chance that your CV joint is the culprit.
You have two CV joints with one positioned on both ends of the drive shaft. These are called the outer and inner CV joints. The outer joint does the most work and carries the most load. That is why the outer joint is more likely to break than the inner one.
Symptoms That Your CV Joint is Broken Include
- A vibration you can feel in the steering wheel
- Clicking sounds and clacking noises that occur in time with the speed of the vehicle or when you lock in the differential
- A vibration so severe you can feel it in the floorboard of the car
Checking Your CV Joints
If you think there is a chance your CV joint is failing you can do a visual inspection to verify your suspicions.
Start this inspection by parking on a flat and level space.
Step in front of the car and bend over so you can see the CV joints.
The right and left front axle shafts should be at equal angles. If they are not then you more than likely have a problem.
Now inspect the rubber boots at the end of the shaft for cracks or signs of deterioration.
Look to see if all clamps are in place and holding together.
Now go beneath the vehicle by laying on your back. Put your hands on the CV axle and push and pull it with your hand. You should not be able to move this shaft more than 1/8” in either direction. If you can move it more than that the CV joint needs to be replaced.
The solution
You are going to need to replace the CV joint that is going bad.
You can do this work yourself if you are mechanically inclined and comfortable using jacks, jack stands, and power tools. Not everyone has the skills and time to do this kind of repair for themselves. You may need to enlist the services of a repair shop to get this fixed.
If you have the repairs done in a shop you are looking at parts costing between $150 and $400 with labor costing about $130. You will more than likely get out of the shop spending less than $300 dollars.
Universal Coupling
Signs of universal coupling problems
- Excessive tire wear on the inside of the tire
- Clicking sounds when you are making a turn
- Noise increases when you accelerate or when you let off of the start to reduce speed
- You feel vibrations when you increase your speed.
- Leaks from your transmission
- The vehicle will not move forward or backward
Replacing The Universal Coupling
If the universal coupling has gone bad it has to be replaced. The cost of the new parts is relatively low, probably less than $25, but you may need a pro to do the work. Even if you hire a professional the labor charges will likely be less than $150 dollars.
Many shade-tree mechanics do this work themselves.
Things you will need
- Transmission fluid
- Panto catch fluid when it drains from the transmission’
- Set of end wrenches from 3/8 to 7/16
- Large c-clamp or universal coupling press
- Mallet
- Pry bar or large screwdriver
- Small slotted screwdriver
- Lock ring pliers
- Needle nose pliers
- Carjack
Step by Step Process
Step 1. Jack the vehicle up
Step 2. Check under the front wheels to prevent the vehicle from moving. You can also place this vehicle on jack stands to make sure that it does not fall or roll while you are working on it.
Step 3. The driveshaft must be taken loose. There are two clamps on the differential end and you need to unbolt those two clamps. Place the clamps in a safe place for later use.
Step 4. Slide the other end of the driveshaft out of the transmission. You will lose some transmission fluid so you should have a pan sitting beneath the tranny at this juncture to catch the fluid that escapes. If this fluid is protected and kept clean it can be put back into the transmission when you are finished.
Step 5. Bring the driveshaft out from under the vehicle so you have room to work. If you have a work table you can place the driveshaft upon it to make it easier to access and reach all of the components.
Step 6. Remove the lock rings holding the caps of the universal coupling in the proper position. Your new coupling will have new lock rings so you do not have to worry about being extra careful with these.
Step 7. Remove the caps using the press or c-clamp. This sounds very simple, and it is, but it can also be time-consuming. Be patient and do not try to force the caps off.
Step 8. Remove the old coupling and set it aside.
Step 9. Place the new universal coupling in position on the yoke and hold it in place while you insert new caps
Step 10. Install the new lock rings that came with your universal coupling
Step 11. You need to reassemble everything by placing the driveshaft back into the transmission and tightening all clamps and bolts necessary.
Step 12. The transmission fluid that was lost needs to be poured back into the vehicle before you finish. If you see any trash or debris in the liquid you saved do not pour it back into your car.
After putting everything back into place your next step is going to be to drive the vehicle around and see if the new universal couplings remedied the clicking noises you were hearing.
Frequently Asked Question
Is a Universal Coupling The Same Thing As a Universal Joint?
Yes, the universal coupling and universal joint are the same things.
Can you change universal couplings in a couple of hours?
If everything goes right for you it should not take you more than 3 hours to complete this task.
Can you grease your CV joint boots?
Yes, you can grease the boots and this should be part of your regular maintenance.
Final Thoughts
Clicking and popping noises can also be indicators of many different minors and major problems. Check out each strange noise you hear as soon as possible and you can often prevent a minor problem from escalating into a major one.
Related Articles
1. Jeep Wrangler Knocking Noise When Accelerating
2. 4 Wheel Drive Grinding When Turning